

AJICA + CLAUDE CODE
A task board for Claude Code.
Give your coding agent a clear brief, a visible place to report progress and a record of the result. Ajica connects your local board to Claude Code through MCP.
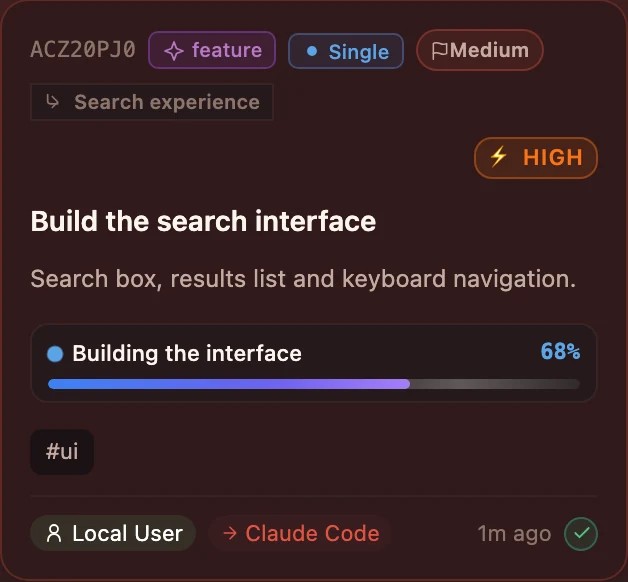
Keep the brief out of terminal history.
Use Ajica as a task manager alongside your Claude Code terminal. A kanban card holds the scope, acceptance criteria, progress updates and questions, so you can return to the work without reconstructing an old conversation.
One card, one clear outcome
Write what should change and how you will check it. Keep unrelated fixes in separate tasks.
Progress you can follow
The agent reports its status to the board. When it needs a decision, you can answer on the task.
A result you can review
Read the summary and checks, inspect the code diff and decide what happens next.
Connect Claude Code to your project
Setup commands checked on 2 November 2026.
Before you start
Run Ajica and open the project folder you want the agent to work in. These examples use the default local server at http://127.0.0.1:7331. Install and authenticate Claude Code separately using its official guide.
Claude Code installation guide1. Make the Ajica CLI available
On Mac, choose “Install CLI tool (ajica)” from Ajica’s menu bar menu. It creates ~/.local/bin/ajica. The commands below use that full path, so it does not need to be on your shell’s PATH.
On Linux, use your installed Ajica server binary in place of ~/.local/bin/ajica throughout this guide. If it is installed on PATH as ajica-server, start with the Linux commands below. Server installation is covered in the quick start.
2. Preview, then apply the project configuration
In your repository, run the first command to inspect the proposed changes. Run the second only after reviewing the preview. The setup merges the Ajica MCP entry and preserves unrelated MCP servers.
cd /path/to/your/project
~/.local/bin/ajica connect claude-code --root . --hooks
~/.local/bin/ajica connect claude-code --root . --hooks --apply
Linux commands
cd /path/to/your/project
ajica-server connect claude-code --root . --hooks
ajica-server connect claude-code --root . --hooks --apply
Review the files it prepares
.agents/skills/ajica/- The full Ajica workflow skill for this project.
.claude/skills/ajica- A link that makes the skill available to Claude Code.
.mcp.json- The project MCP entry for the Ajica server.
.claude/settings.local.json- Optional project-local session hooks; keep this machine-specific file uncommitted.
Hooks report session activity and deliver task inputs. Omit --hooks from both commands for MCP-only setup. Add --require-task to both commands if you want hooks to reject edits without a claimed task or outside the project root.
No credentials are put in these project files. The MCP command may contain the full path to your installed Ajica binary; review that machine-specific path before sharing .mcp.json. A conflicting skill link is reported for you to resolve.
3. Approve the agent connection
If Claude is not enrolled yet, run the command below from the same project folder. Approve the exact user code shown by the CLI in Ajica. Enrollment saves the agent credential locally; you do not copy a token into your repository or chat.
~/.local/bin/ajica enroll --slug claudeOn Linux, use ajica-server enroll --slug claude, or the path to your installed server binary. The client selector is claude-code; the agent identity is claude.
4. Check the connection in Claude Code
Start or restart Claude Code in that project folder. Review the project MCP and hook definitions before approving them. Use /mcp to check that the ajica server is connected. Ask Claude to read the Ajica skill and resolve this project before taking a task.
From a task brief to a reviewed change
Start with a small, testable task. This example uses the search interface from the demonstration card above.
EXAMPLE TASK BRIEF
Build the search interface
Add a search box, a results list and keyboard navigation. Show an empty state when nothing matches. Keep the change within the existing search UI. Run the project’s relevant checks and attach the results to the task.
Define the result
Create the card in Ajica and include the scope and acceptance criteria. Make sure the card belongs to the repository you just connected.
Give the task to Claude
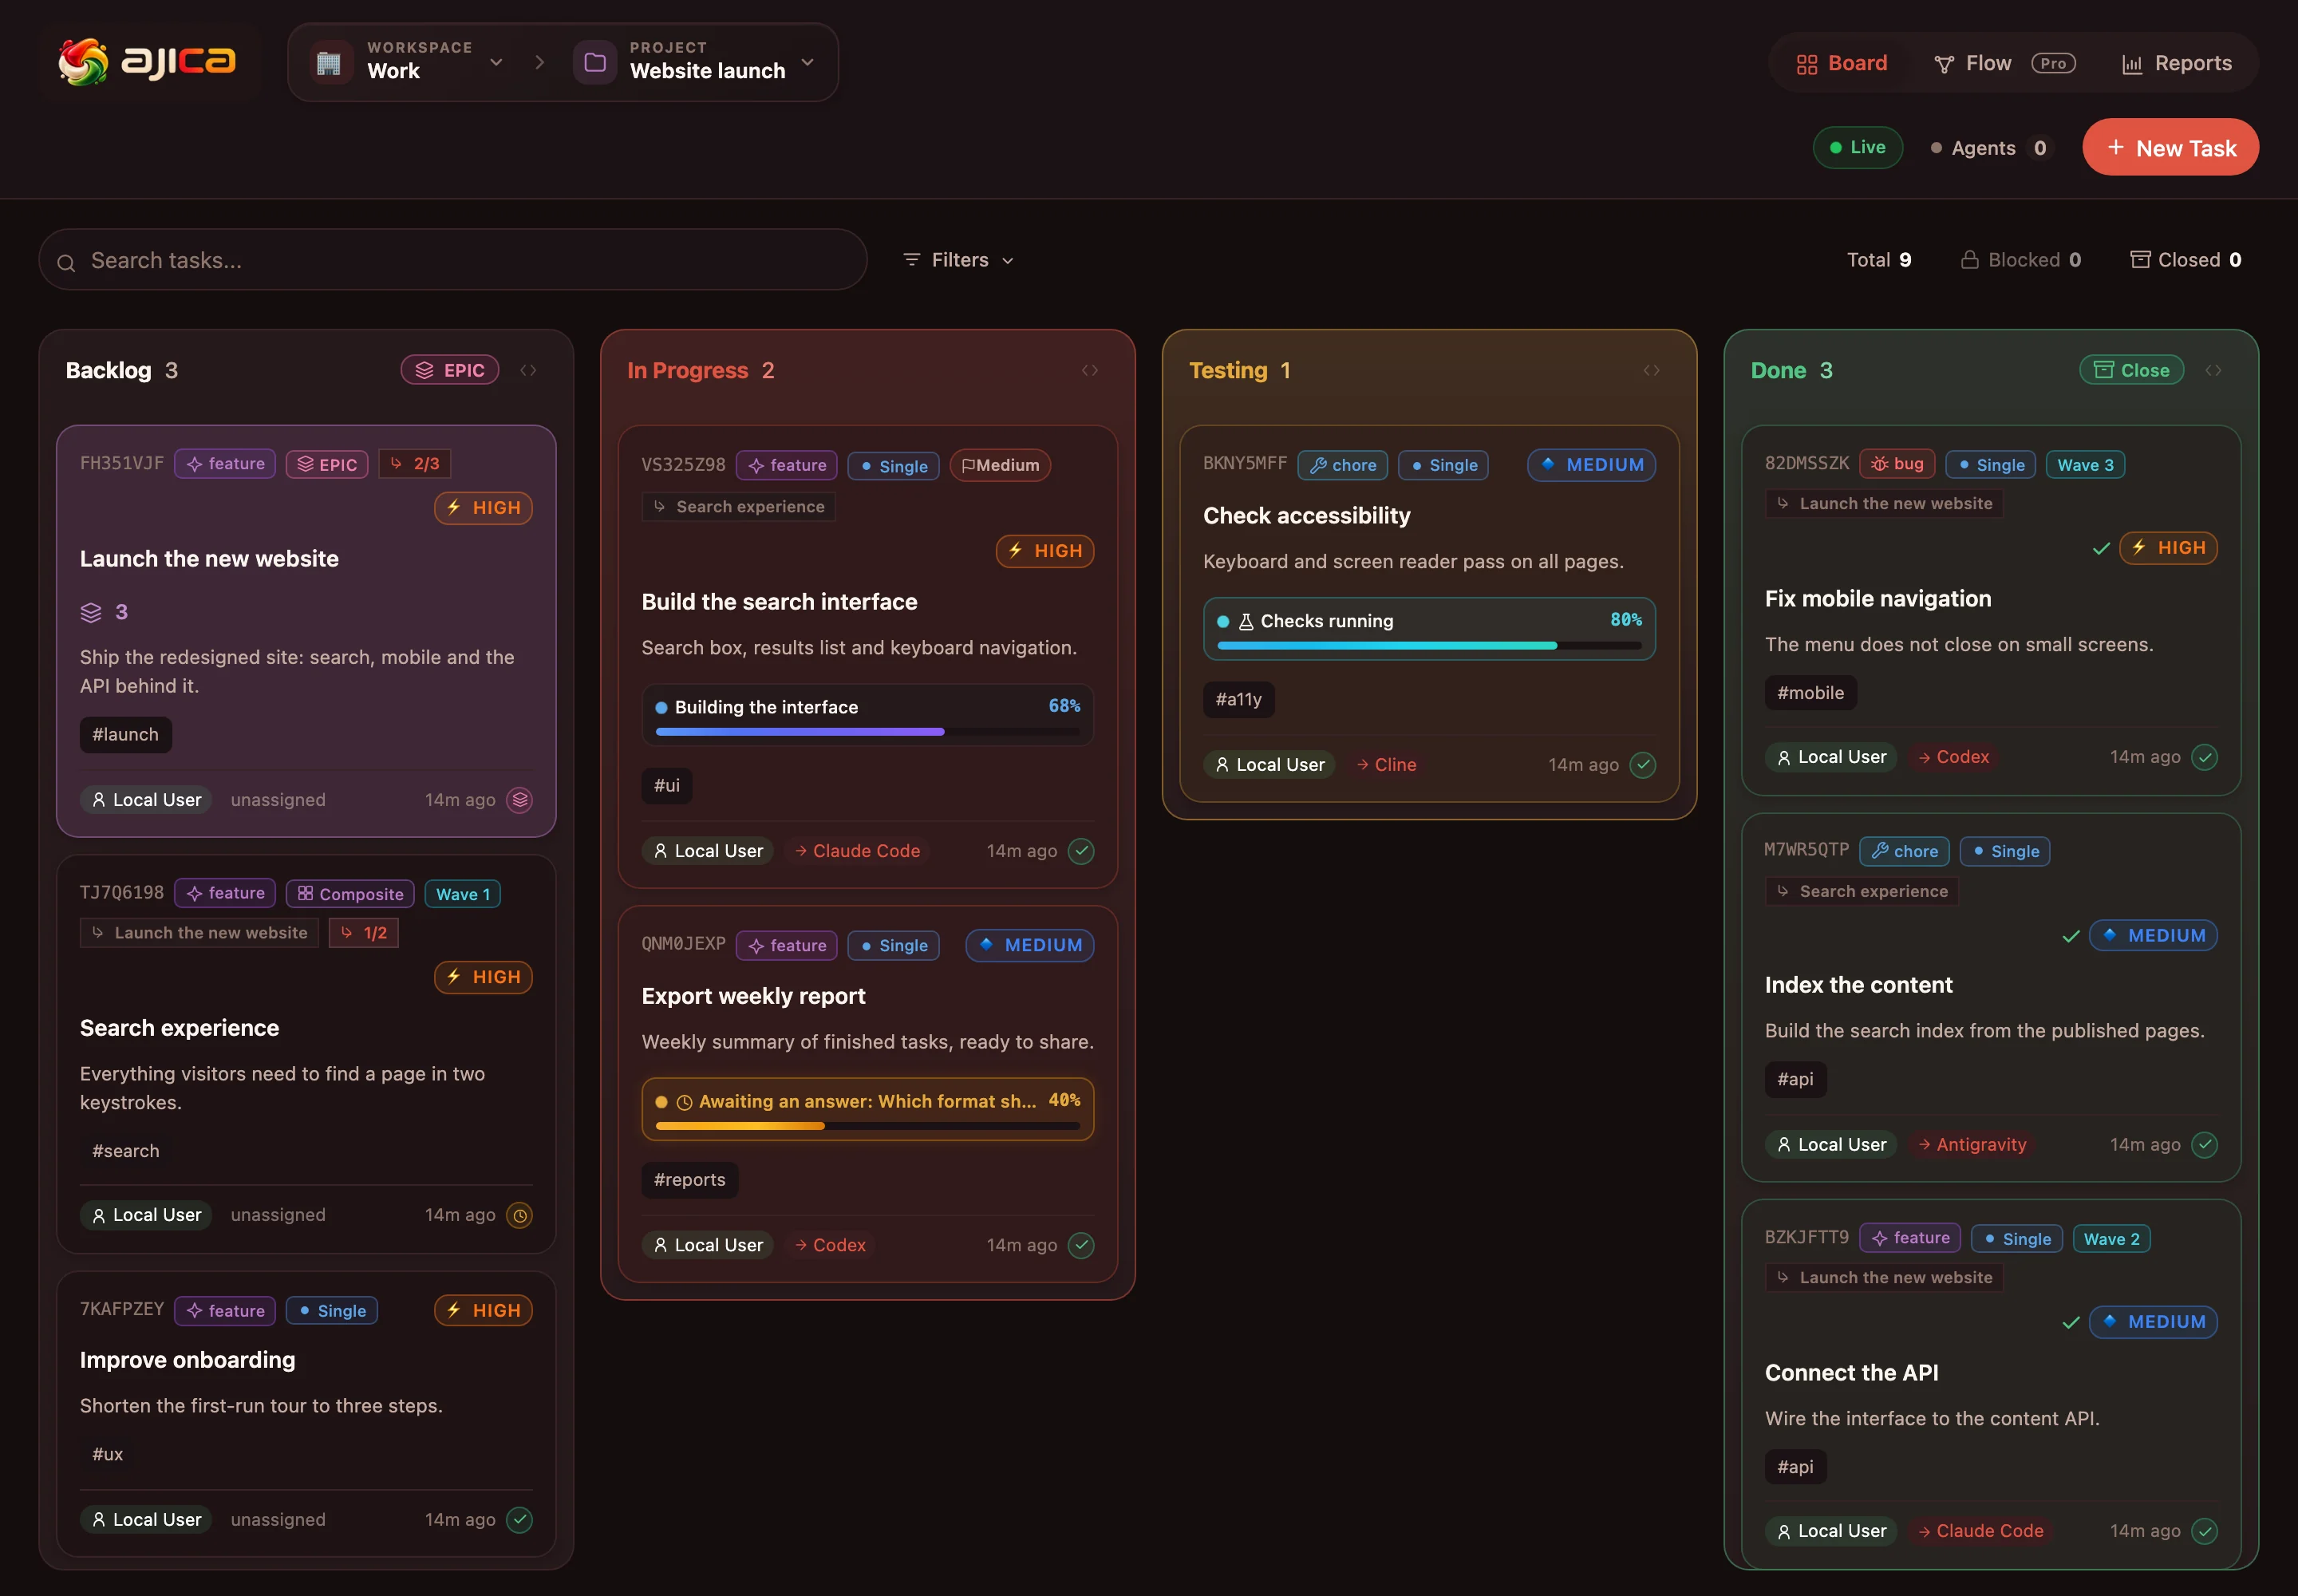
In your connected Claude Code session, ask the agent to read that card, claim it and follow the Ajica workflow. To launch a new CLI from the board instead, configure the Claude Code agent in Ajica, assign the card to it and move the card to In Progress.
Follow progress and answer questions
The agent updates the card as it works. Answer a pending question on the task when it needs a decision. Delivery follows session activity; an idle terminal conversation may need its next prompt before it receives new input.
Check the result
The agent moves the task to Testing for checks, returns it to In Progress if a check fails, and records the result when finished. Review its summary, test output and repository diff before merging or deploying.
If the connection needs attention
The Ajica command cannot be found
On Mac, install the CLI from Ajica’s menu and use the full ~/.local/bin/ajica path. On Linux, use the executable path you installed. If connect is not recognized, check that you are running the current Ajica build.
Ajica is missing or disconnected in /mcp
Check that Ajica is running, the configured server address matches your installation and Claude Code was opened in the folder containing .mcp.json. Restart the session after changing project configuration, then review the MCP approval prompt.
The agent cannot access the project
Enroll from the intended repository. If Ajica asks you to register that folder or approve project access, review the request in Ajica. Keep the agent in the same canonical project folder rather than granting access to an unrelated directory.
Questions about the integration
Do I need Ajica Pro or a Claude subscription?
Ajica Community is free; see the plan comparison for Pro features. Claude Code needs its own supported authentication and model access. Ajica does not include Claude Code usage or provider charges.
What stays local?
The Ajica board runs on your Mac or on the server you operate. Claude Code still uses its configured model provider under that provider’s policies. A local task board does not turn a hosted model into local inference.
Does this setup work with Claude in a browser?
This guide connects the Claude Code CLI through a local stdio MCP server. A cloud session has a different network environment and cannot reach your Mac’s 127.0.0.1 address directly. Check the official client documentation for its supported connection methods.
Does connecting the board grant every tool permission?
Claude Code keeps its own project trust and tool permission controls. Review the Ajica configuration and approve the tools you intend to use. Repository checks and your review process still apply to the agent’s changes.
Give your next Claude Code task a home.
Install Ajica, connect one repository and start with a small task you can verify.